- Unix like operating system
- ability to add job to crontab
- ability to run CGI scripts
- PHP >= 4.3.0 , with extensions:
- - zlib
- - curl or sockets
- - 'virtual' function enabled if you need to include in.cgi from php script
- ionCube PHP Loader
- MySQL server >= 4.1
Short description:
- Login to crystal-scripts.com and generate new license key
- Put install.php
http://crystal-scripts.com/downloads/trader/install.php
into 'crtr' or your domain root directory and chmod it to 777.(You can chmod your root directory back after installation complete, but the 'crtr' directory must always be 777) - Go to http://yourdomain.com/install.php (http://yourdomain.com/crtr/install.php) and follow the instructions
- Add new job to crontab
To install a copy of the Crystal Trader script on your domain you should have a valid license key. This key is mandatory for the all installation types.

First you need to login to the license server from the main page of site. If you don’t have a login on the site you can get one by registering here. The registration process is one click and takes less than a minute: just fill out all fields and press the button. Once you register you will be redirected to the main account page. If you already have an account, skip this step and log in.
On the main account page you can get the installation script in different formats for your convenience. The installation script will assist you with the installation process to your domain. To install the Crystal Trader script to your desired domain you should download (and unpack the archive if necessary) and then upload the install script to the root directory of your domain or directory crtr in the domain root. The root domain directory or directory crtr should have world-writable permissions (chmod 777) to successfully complete installation process.
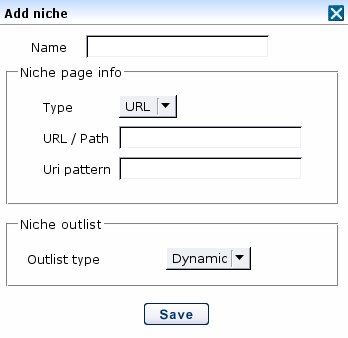
To install the copy of Crystal Trader script you’ll need a valid license key. The license key is domain-based so you can use only one copy of the Crystal Trader script per domain. At the moment you can get license for free from you account's main page. To get the license please choose Crystal trader from products list and choose the latest version of product. We recommend you use the latest version of the software for all new installations with the exception of special cases when it is necessary to use a previous version. After making your selection a new license will appear in the license list. From this page you can control how many copies of the Crystal Trader script you have installed on your domains. A newly created license doesn’t have an assigned domain until you’ve done so.
To start the installation process please point your browser to http://yourdomain.com/install.php (or http://yourdomain.com/crtr/install.php depending on script location) and follow the instructions. You’ll be asked for the newly generated license key. It can be used for one copy of the script on one domain. The script will ask a few questions and do preinstall checks to make sure the server requirements are met (PHP version and so on). The actual installation process is subject to change and that's why not covered here but it’s simple and easy to understand. If you need help please do not hesitate to ask support for assistance. After all checks are passed the installation script will attempt to get all the necessary files from the server and will create working folders. It can take some time depending on the connection speed between servers and current server's load. If the install process is completed without error the script should show a congratulatory message with a link to the admin area along with a login and temporary admin password. It is strongly recommended that you change this password to a stronger one after your first login to the admin area. Also the last installation screen will show instructions about manual modifications that should be done to complete installation. At this point you should add new items to the crontab.
You will get string for cron after install process finished.
* * * * * cd /full_path/to/your/domain/root/directory/crtr/bin && ./cron.sh 1>/dev/null 2>/dev/null
back First steps After script is installed and the job is added to crontab you need to do the following:- change the password at Settings->Main Settings->Security, and enable blocking by IP if needed
- if you migrate from another script try to import your database at System->Import
- set skim for system traders (noref, notrade, nocookie, exout). Just press the edit button on each trader to do this like on any other traders. Skim for notrade trader will works for SE trader.
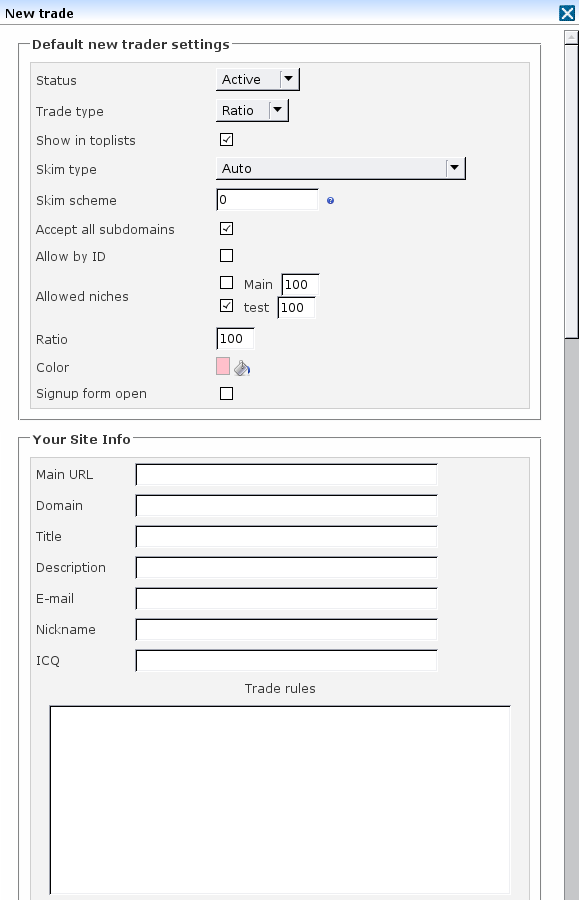
- change parameters for New traders at Settings->Main settings->New trade. They will work for traders from crtr/trade.php and for new trades from admin panel. Additionally you should add your site information here.
- Setup counting of incoming and outgoing traffic as it described in the Count traffic section
Crystal Trader always organizes trades by niche. If you don’t need niche trading you will have one default niche: 'Main'.
A trader is added to a niche when its weight bigger than 0. The trader’s position in the outlist depends on its weight in the niche. Our recommended value for weight for all traders is 100. But weight is a relative parameter and you can choose any value as your base.
Every niche has its own outlist and traffic is not mixed between niches by default. You can add a trader to more than one niche with different 'weights' and mix traffic in that way.
Don't forget to add an nt parameter to query to out.cgi if you have more than 1 niche. Where nt is the id or name of niche where you want to send this click.
Example:
out.cgi?nt=1 – script will looks for traders in the niche ‘Main’ to send this click.
You need to put a code with in.cgi on all pages of your site. Crystal trader doesn't count ins when the referrer is your domain.
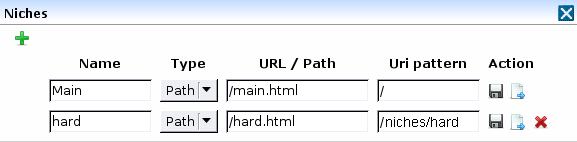
- Type, Url/Path fields are used only when in.cgi works in CGI mode.
- Type – type of page shown. in.cgi will get value from Url/Path field and if type Redirect it redirects to it or it will open path and show the content of the file to the visitor.
- Url/Path – Url or path to file.
- Uri pattern – it always starts from / and it says to the script from what url the niche should be started.
Example:
All your Niche1 pages are located at /niche1 directory. Url pattern=/niche1. So the script will count all incoming traffic to this directory for Niche1. Using this parameter in.cgi can detect in what niche the traffic was started.
You can reach the edit outlist positions form in two ways. Click on the image  in the header of the niche stats table or from the top edit niches menu.
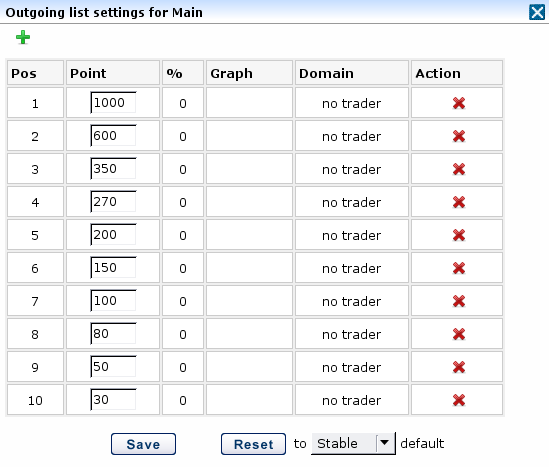
By setting points for every position in the outlist you can distribute traffic between positions. At anytime you can reset them to one of 3 predefined defaults (Stable, Optimal, Dynamic).
back incoming (in.cgi):in.cgi – the script that counts incoming traffic (SSI mode) and can show the niche page or redirect to a niche url (CGI mode).
in.cgi parameters:
'ssi' - 0 or 1, ssi=1 is required for SSI mode
'niche' - niche id or niche name, with preference of niche id
'ref' or 'id' - trader id or trader domain; if in.cgi receives it and the trader has the option 'Allow traffic by ID' checked this trader used against get it from referer
'cl' - 0 or 1, count local domain traffic(by referer) if it was not counted before(no cookie)
Warning !!! Url parameter must be the last.
in SSI mode you must put code on your pages within the <head> tag
for .shtml pages:
<!--#include virtual="/crtr/cgi/in.cgi?ssi=1&niche=AAA&$QUERY_STRING" -->
for .php pages:
<?php
virtual('/crtr/cgi/in.cgi?ssi=1&niche=AAA&'.$_SERVER['QUERY_STRING']);
?>
Where AAA is numeric niche id or niche name. You can skip this parameter if you have valid 'uri patterns' in niche settings.
Crystal Trader detects what trader sends traffic by the visitor’s referer and by parameter in query to in.cgi
If you want trader send traffic to a url with ID the Allow traffic by ID checkbox must be checked in the Edit trader form. You can just add the trader’s parameter to url trader send traffic if you have &$QUERY_STRING added to query to in.cgi.
Example:
Your main page is http://domain.com/main.shtml
Url with id will looks like http://domain.com/main.shtml?ref=TRADERS_ID_OR_DOMAIN
in CGI mode in.cgi receive all traffic and show page or redirect it to some niche page
In this mode you can make in.cgi your index page on domain by puting this string
DirectoryIndex /crtr/cgi/in.cgi
into your .htaccess file
outgoing (out.cgi):
out.cgi possible parameters:
'id' or 'ref' - trader id or trader domain to send click,
'l' or 'tag' or 'link' - link name,
'p' or 's' - skim scheme (60 or 60g or 60g,100t,50g etc.),
'hp' or 'hs' - hard skim scheme, it has the biggest priority than skim scheme or trader's skim
'cc' or 'c' or 'fc' -number of first clicks to content
'u' or 'url' or 'trade' - gallery or trader url
'nt' or 'nicheto' or 'grto' or 'groupto' - niche id or name to send click
##ID_D## - traders numeric id
##URL_D## - traders url
##DOMAIN_D## - traders domain
##TITLE_D## - traders title
##IMAGEURL_D## - traders thumb url
##DESCRIPTION_D## - traders description
##RIN1_D## - last hour raw ins
##UIN1_D## - last hour unique ins
##CL1_D## - last hour all clicks
##CLT1_D## - last hour tarder clicks
##OUT1_D## - last hour outs
##RIN24_D## - last 24 hours raw ins
##UIN24_D## - last 24 hours unique ins
##CL24_D## - last 24 hours all clicks
##CLT24_D## - last 24 hours tarder clicks
##OUT24_D## - last 24 hours outs
Where D is position number starts from 0
Usage example:
in.cgi and out.cgi default location:
<table width="240" border="0" cellspacing="0" cellpadding="0">
<tr align="center">
<td width="120"><a href="/crtr/cgi/out.cgi?id=##id_0##&l=top_top&u=##url_0##">##title_0##</a><br />
<a href="/crtr/cgi/out.cgi?id=##id_1##&l=top_top&u=##url_1##">##title_1##</a><br />
<a href="/crtr/cgi/out.cgi?id=##id_2##&l=top_top&u=##url_2##">##title_2##</a><br />
<a href="/crtr/cgi/out.cgi?id=##id_3##&l=top_top&u=##url_3##">##title_3##</a><br /></td>
<td width="120"><a href="/crtr/cgi/out.cgi?id=##id_4##&l=top_top&u=##url_4##">##title_4##</a><br />
<a href="/crtr/cgi/out.cgi?id=##id_5##&l=top_top&u=##url_5##">##title_5##</a><br />
<a href="/crtr/cgi/out.cgi?id=##id_6##&l=top_top&u=##url_6##">##title_6##</a><br />
<a href="/crtr/cgi/out.cgi?id=##id_7##&l=top_top&u=##url_7##">##title_7##</a><br /></td>
</tr>
</table>
in.cgi and out.cgi copied to cgi-bin directory:
<table width="240" border="0" cellspacing="0" cellpadding="0">
<tr align="center">
<td width="120"><a href="/cgi-bin/crtr/out.cgi?id=##id_0##&l=top_top&u=##url_0##">##title_0##</a><br />
<a href="/cgi-bin/crtr/out.cgi?id=##id_1##&l=top_top&u=##url_1##">##title_1##</a><br />
<a href="/cgi-bin/crtr/out.cgi?id=##id_2##&l=top_top&u=##url_2##">##title_2##</a><br />
<a href="/cgi-bin/crtr/out.cgi?id=##id_3##&l=top_top&u=##url_3##">##title_3##</a><br /></td>
<td width="120"><a href="/cgi-bin/crtr/out.cgi?id=##id_4##&l=top_top&u=##url_4##">##title_4##</a><br />
<a href="/cgi-bin/crtr/out.cgi?id=##id_5##&l=top_top&u=##url_5##">##title_5##</a><br />
<a href="/cgi-bin/crtr/out.cgi?id=##id_6##&l=top_top&u=##url_6##">##title_6##</a><br />
<a href="/cgi-bin/crtr/out.cgi?id=##id_7##&l=top_top&u=##url_7##">##title_7##</a><br /></td>
</tr>
</table>
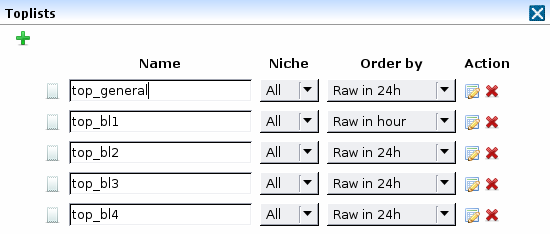
To include toplist on your pages use following code
for .shtml pages:
<!--#include virtual="/crtr/toplists/TOPLIST_NAME.html" -->
for .php pages:
<?php virtual('/crtr/toplists/TOPLIST_NAME.html'); ?>
or
<?php
include('/relative/or/absolute/path/to/crtr/toplists/TOPLIST_NAME.html');
?>

The main page of the admin panel consists of top menu and stats tables and most can be excluded from showing. You can do it, clicking on this icon  in the top menu and remove the check from the tables you would like to exclude or by clicking the [X] in the right top corner of table.
To refresh the stats you don’t need to reload the page. Just click on the  in the top menu or in the header of any stats table.
From any domain in your site’s network you can check stats and control any other domain. For switching you should choose the domain on the top and press the button. If you want it to open in new window, use the checkbox next to it.
You can switch to the domain by clicking on the domain name on the bottom of the stats.
Also, you can choose which columns should be shown in the table along with their colors and titles. You can do it if you click on the  in the header of the table you would like to change. You can change it quickly if you click on the
  in the header of the table
If you want to change the sorting of traders, just click on the column title.
There are two possibilities for getting access to the control menu and the stats for traders and groups of traders. By default you can do it clicking on the  on the left of the domain or group name (niche, trades, system, feeders, total). If you disabled this column from showing the popup menu will activate after you mouse over the domain (group) name.
Clicking on the cell 'forces' you can setup forces for a chosen trader. You can edit weight in the niche in the same way.
back Skim and skim typesThere are 3 types of skim that you can set for every trader:
- Auto
- GET parameter then skim scheme
- Skim scheme then GET parameter
- Settings->Main settings->Other, Auto skim block.
There are 3 skims - Normal, Lowest and Max skim. Script use one of them depending on 'return'
Normal skim when min <= 'return' <= max
Lowest skim when 'return' < min,
and Max skim when 'return' > max - GET parameter is what you send to out.cgi (http://domain.com/crtr/cgi/out.cgi?s=67&u=http://dom.com/gallery1/). In this example skim from get is 67
With this skim type script will use at first skim from GET and skim scheme if no skim from GET - Use skim scheme before skim from GET. If no skim scheme or it == 0 skim from GET will used
single:
Click on the Add trader button in the top menu or Add trader->Add single
See Add/Edit trader
multiple:
Add trader->Add multiple in top menu
Select a field from left 'Select' and press  to add it. Put the trader’s string in the bottom text area. Add only one string for each trader.
- Domain – trader’s domain
- Allow subdomains – [0,1]
- Url – trader’s url
- Title
- Description
- Icq
- Password
- Toplist – [0,1] , enable the trader in toplists
- Toplist_image – trader’s image url
- Trade type – [crystal, ratio]
- Skim type – [auto, p_h, h_p] , p_h – GET parameter then skim scheme, h_p – skim scheme then GET parameter
- Skim – skim scheme
- Status – [act, dis, del] , active, disabled, deleted
- Ratio
- Allow_id – [0,1] allow detect trader by id in GET to in.cgi
- Color
- Is feeder – [0,1]
- Weight – traders weight in niche
- Niche name
- Niche id
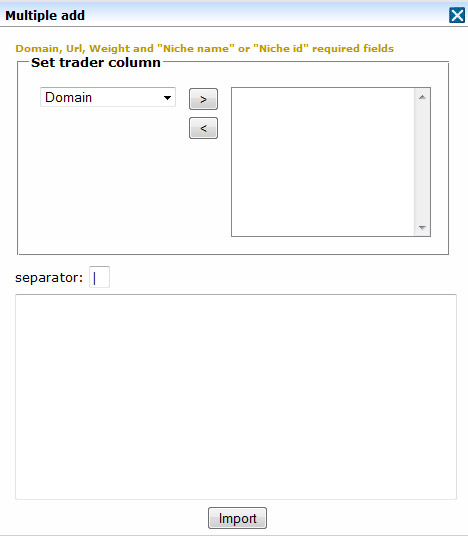
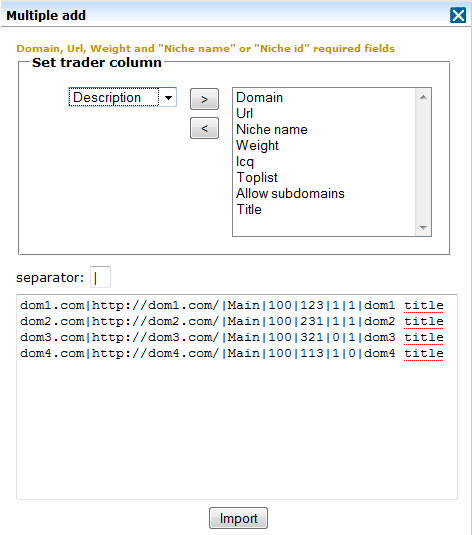
Domain and Url fields are required. Separator – symbol that separates trader fields in bottom text area
back Add/Edit traderAdd/Edit trader form can be 'Normal' or 'Extended'
Normal form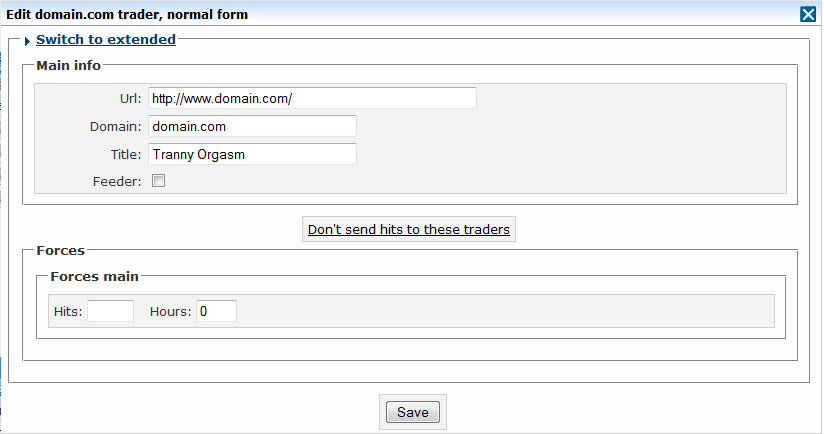
Feeders checkbox – check it to put the trader in a separate stats table. Summary statistics for such traders show as a separate raw entry in the summary stats table.
Forces:- hits – amount of hits per hour
- Hours – amount of hours to force, 0 if no limit
By default script forces hits only from niches in which the trader has weight > 0. You can force it by checking Force from all niche
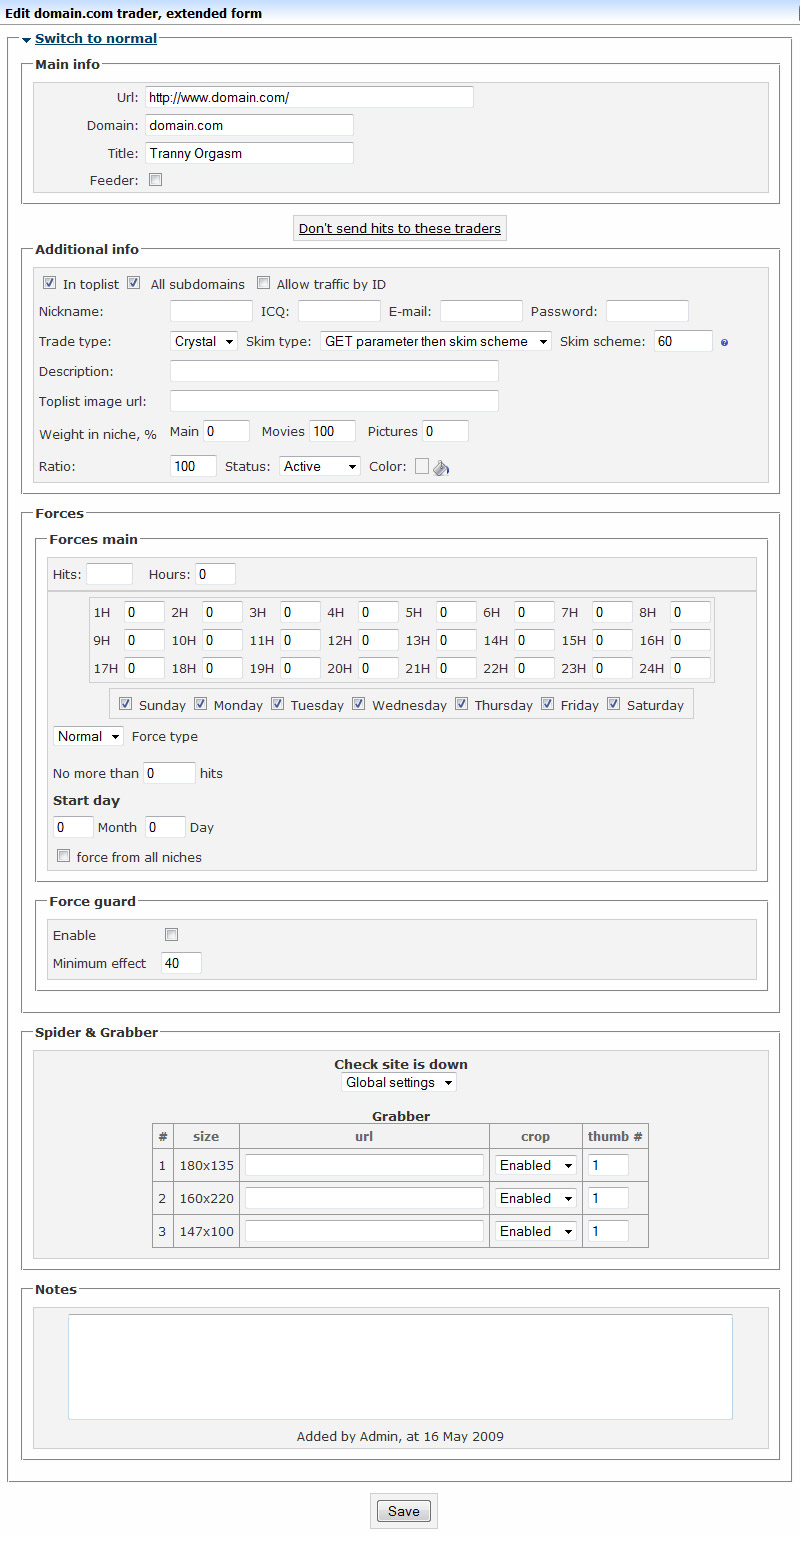
Extended form
Forces:- No more than __ hits – maximum amount of hits to send at all by this force
- In toplist – enable trader in toplists
- All subdomains – count traffic from all subdomains
- Allow traffic by ID – allow trader send traffic with trader’s ID in url, to detect its traffic not only by referrer.
- Don't send hits to these traders – you can select sites here, which shouldn’t get hits from this trader

Click on expand/collapse button.
Select parameter(s) to change or action and click Apply button.

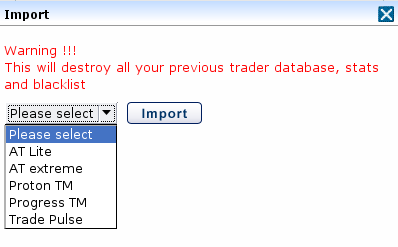
You can import traders in two ways:
- Go to System->Import.
You should choose the script you are going import from and set its database parameters. Attention! The current traders will be deleted.
- Add trader->Add multiple
System->Export
Choose with the help of niches checkboxes from which you are going to export and trader’s status. You can choose multiple if you hold down Ctrl while clicking. Choose the fields you would like to export for each trader in the 'Set trader column' block.
Set field separator in the 'separator'.
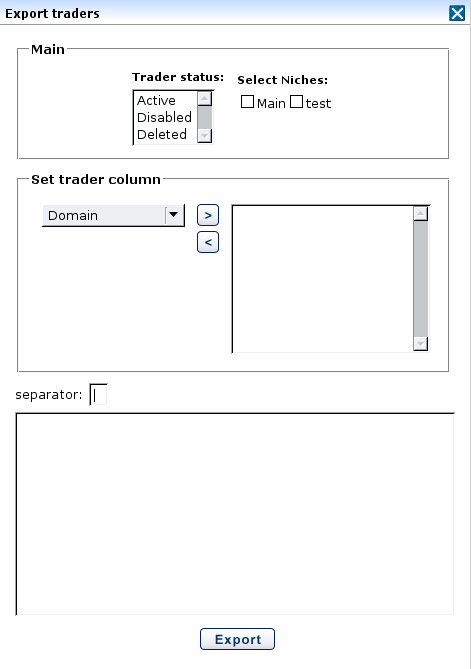
After pressing the export button you will get a list of traders in the bottom text area.
back Thumbnail grabberCrystal Trader can make up to 5 thumbnails for each active trader.
Settings->Checker & Grabber - Grabber block
To enable grabber set the width and height > 0 for at least 1 thumb here.
The grabber can crop or just resize images. Select crop to allow cropping.
You can override this setting in the Trader edit form.
It grabs the first thumb by default from the trader’s site. You can set a thumb number for each trader
All thumbs are located in the 'crtr/thumb' directory. Each thumb has a filename that consists of the trader’s id and the image width and height
Each thumb has a filename that consists of the trader’s id and image setting id (1-5)
Example:
thumbnail for trader with id=54 and with 240x180 size - crtr/thumb/54_240x180.jpg
crtr/thumb/TRADERID_WIDTHxHEIGHT.jpg
crtr/thumb/TRADERID_IMAGESETTINGID.jpg
When you check the option feeder in the edit trader menu you are marking this trader a feeder. Such traders do not get traffic back and have separate stats in the Site total table.
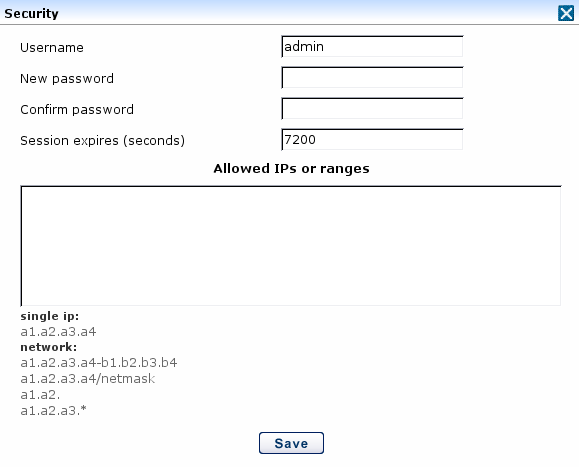
back SettingsSettings->Main settings->Security
You can set username/password session time here and grant access by IP(s) or networks.
Settings->Main settings->New trade
New trader settings will used by default when you add new trader(s) or a trader signs up.
Settings->Main settings->Other
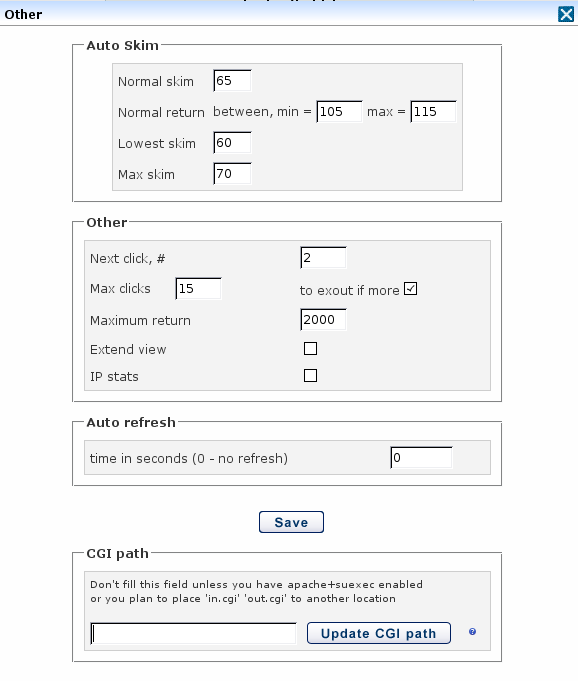
There are 3 skims the script can use - Normal, Lowest and Max skim. The script chooses one of them depending on 'return'
Normal skim when min <= 'return' <= max
Lowest skim when 'return' < min,
and Max skim when 'return' > max
Other block:
Next click # - number of clicks you want to statistics on the main page. To view its stats tables enable 'next.cl' column there.
Max clicks – maximum clicks from 1 user that the script will count as normal. More clicks will be added to database as not counted. You can send these clicks to an exout trader by selecting the proper checkbox.
IP stats – keep stats by IP for the last 24 hours.
Settings->Main settings->Database
MySQL database settings. Use search button to find mysql socket.
back NetworkEach domain can only be in one network. You can add new sites to the network from any site which is already in it. If it’s a new network then there is restriction on which domain you are adding. If you have enabled an IP protection you should disable it temporally or add to the allowed IPs list that is showed in that window.
To check summary stats by domain you should have the network stats table active to show on every domain you want to see in the stats. Button in the top right menu.
System->Updates , When a new update is available you will see it here with a description and the link which will update your script. You will also be informed about update by the icon  in the top right corner.
System->Tools-IP search
Stats by link from Site total table.
You will see the amount of clicks and the % to all clicks with link parameter, and % of all clicks on the site. If you click the link you get a list of domains that made clicks. Clicking on the domain and you get hourly stats.
back Send bug or SuggestionClick on  image at top right to send bug or suggestion.
lost password
Crystal Trader doesn't store your password so it can't be restored. There is only one way to get access back. You must reset the password. Edit file crtr/config/config.php to do this. You must change value of $admin_password variable to
"96e79218965eb72c92a549dd5a330112"
Now you can access the admin panel with the password 111111.
backout.cgi or in.cgi 500 error
In most cases this means apache+suexec is enabled on your server. In.cgi and out.cgi scripts must be copied to a new location. Go to Settings->Main settings->Other , CGI Path block. Enter path to cgi-bin directory here or press search button to find your path then press the Update cgi path button
Warning!!! Cronjob was not started for at least 2 minutes
- Haven’t added job to crontab
- Go to System->Updates , and click Update current version files if you get this error after an update